Creating Audit Reports
Audit Lab reports summarize the findings and evaluation results collected during an audit. Use reports to turn the audit state into a structured document that can be reviewed, edited, downloaded, and shared.
Create a report
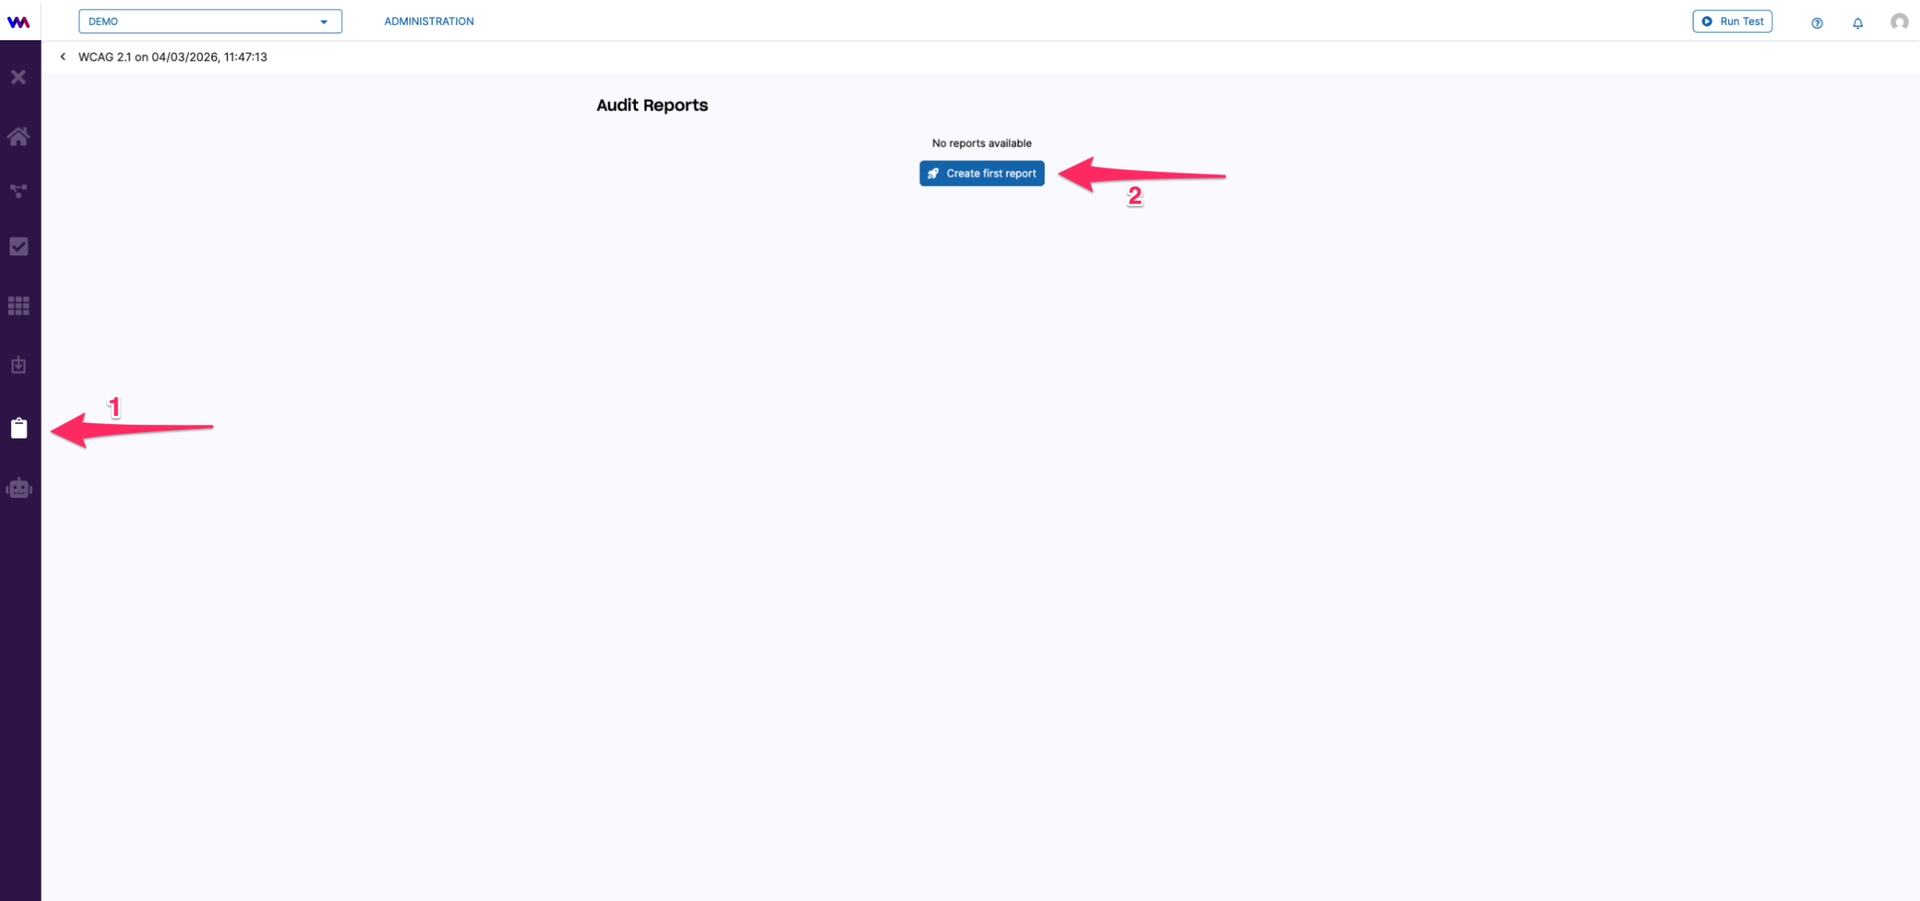
Open an audit and go to the Reports tab. If the audit does not have a report yet, click Create First Report. Otherwise, click Create Report.
The report creation dialog opens. Use it to select the report template, review template-specific configuration, adjust parameters, and start report generation.
Select a report template
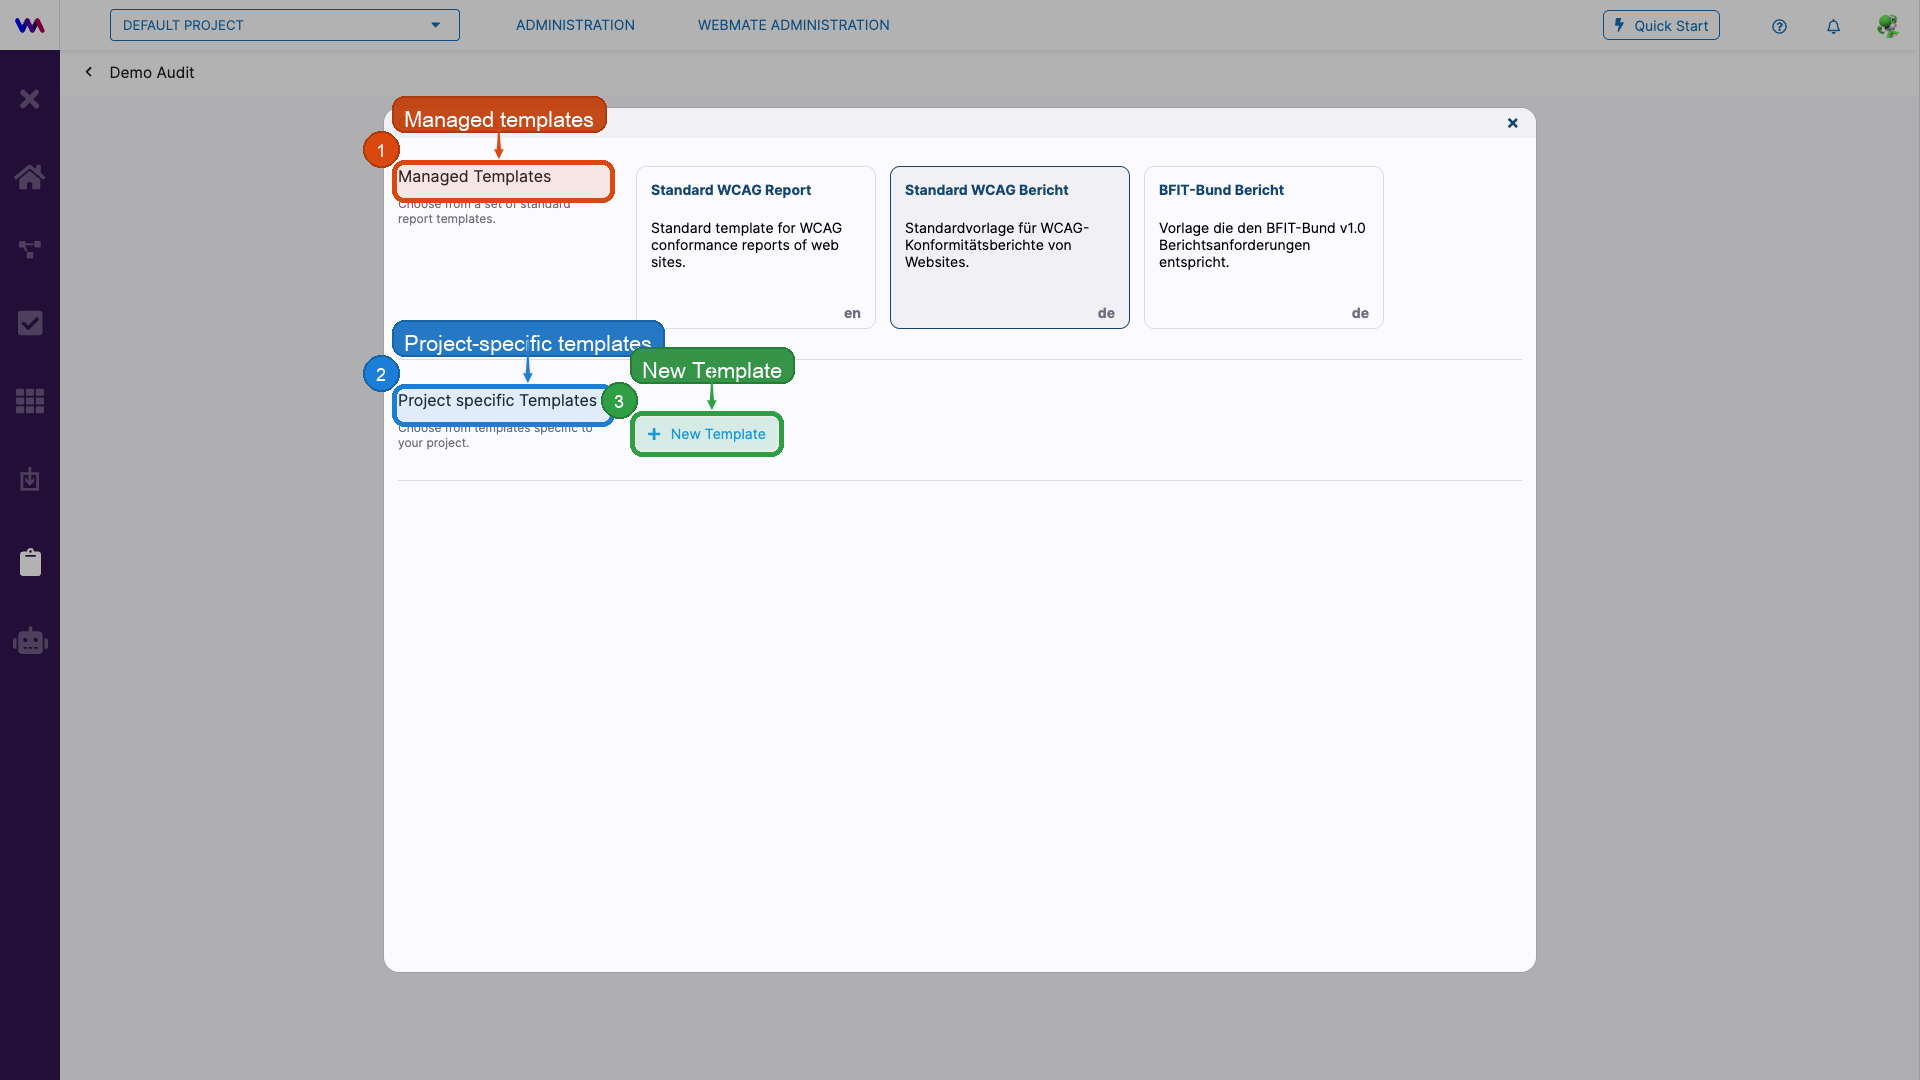
Report templates are split into two sections:
- Managed Templates are standard templates provided by webmate. They are maintained centrally and cannot be edited in your project.
- Project-specific Templates are templates owned by the current project. Use them when your team needs reusable wording or a reusable report structure for future reports.
Choose the template that matches the report you want to generate. For more information about the standard audit templates, see Audit Lab templates .
Create a project-specific template
Project-specific templates are managed from the template selection dialog. Click New Template in the Project-specific Templates section to start the template wizard.
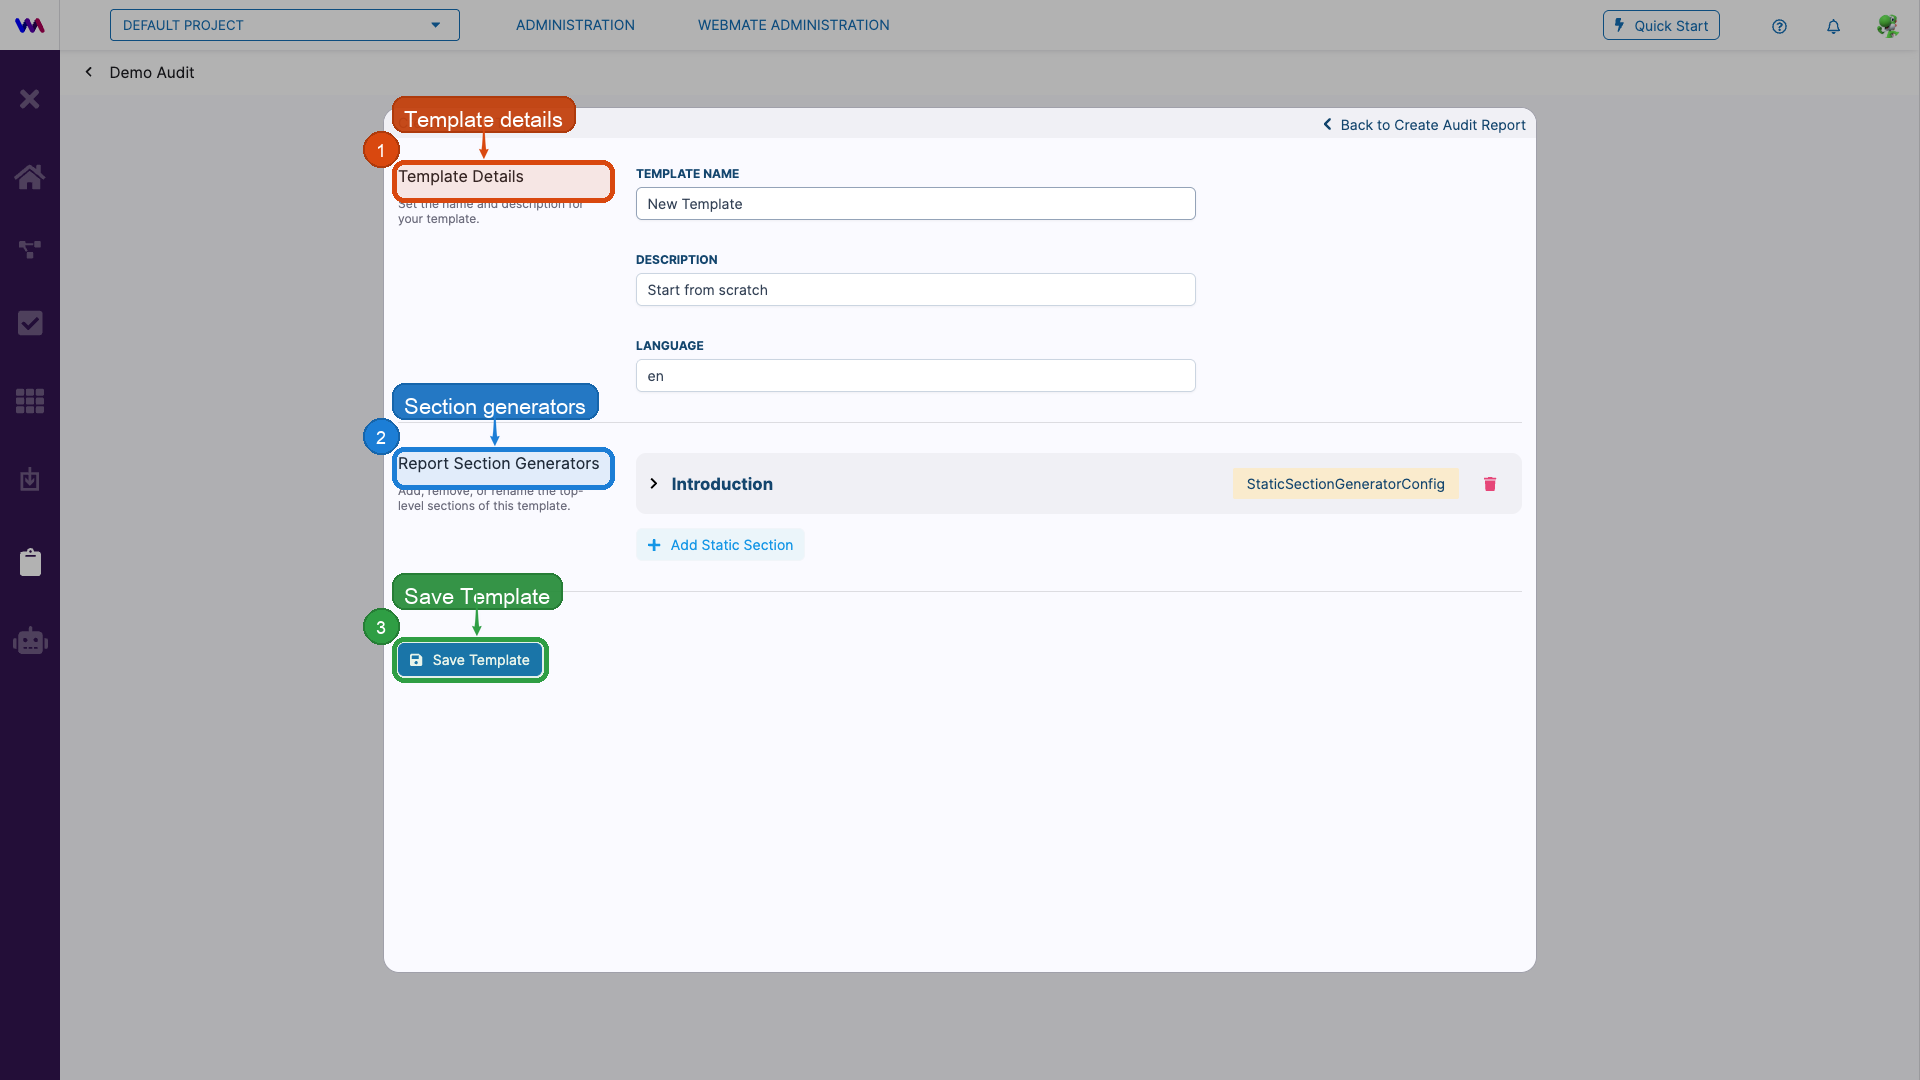
The wizard has two steps:
- Choose a base template. You can start from an existing managed template or from a blank template.
- Edit the template details. Enter the template name, description, and language, then configure the report sections that should be included when the template is used.
Project-specific templates are available to users in the same project. To remove a template that is no longer needed, use the trash icon in the template selection list and confirm the deletion.
Configure reusable report parameters
Some reports use parameters such as organization names, audit metadata, or repeated text snippets. Save these values on the audit when they should be reused across report generations.
On the Reports tab, click Configure Parameters. In the parameters panel, add or edit the values for the current audit, then click Save.
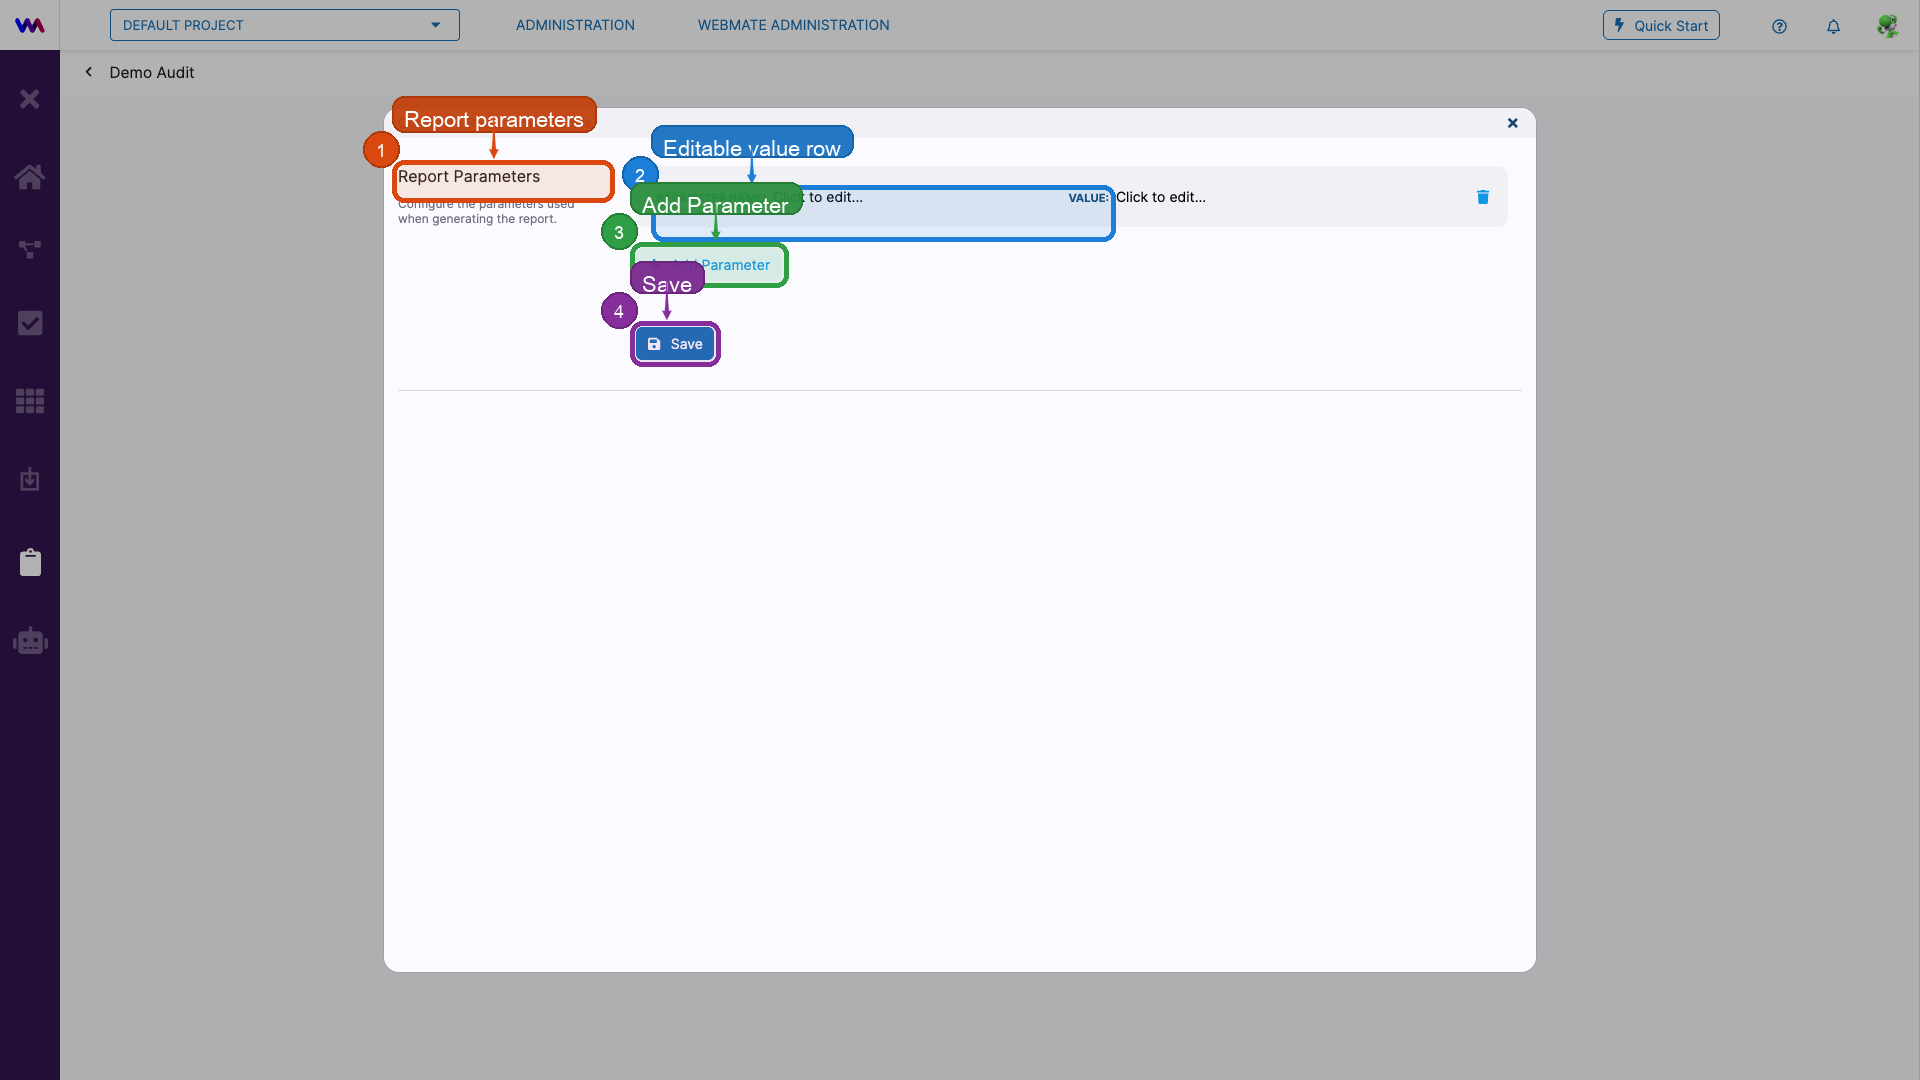
Saved parameters are also shown in the report creation dialog. Text values can be edited inline. Values with predefined options use a dropdown menu. You can add or remove individual parameters before generating the report.
Configure report generation
Before generating the report, review the Configure Report Generators section in the report creation dialog. This section shows the generator configuration used by the selected template.
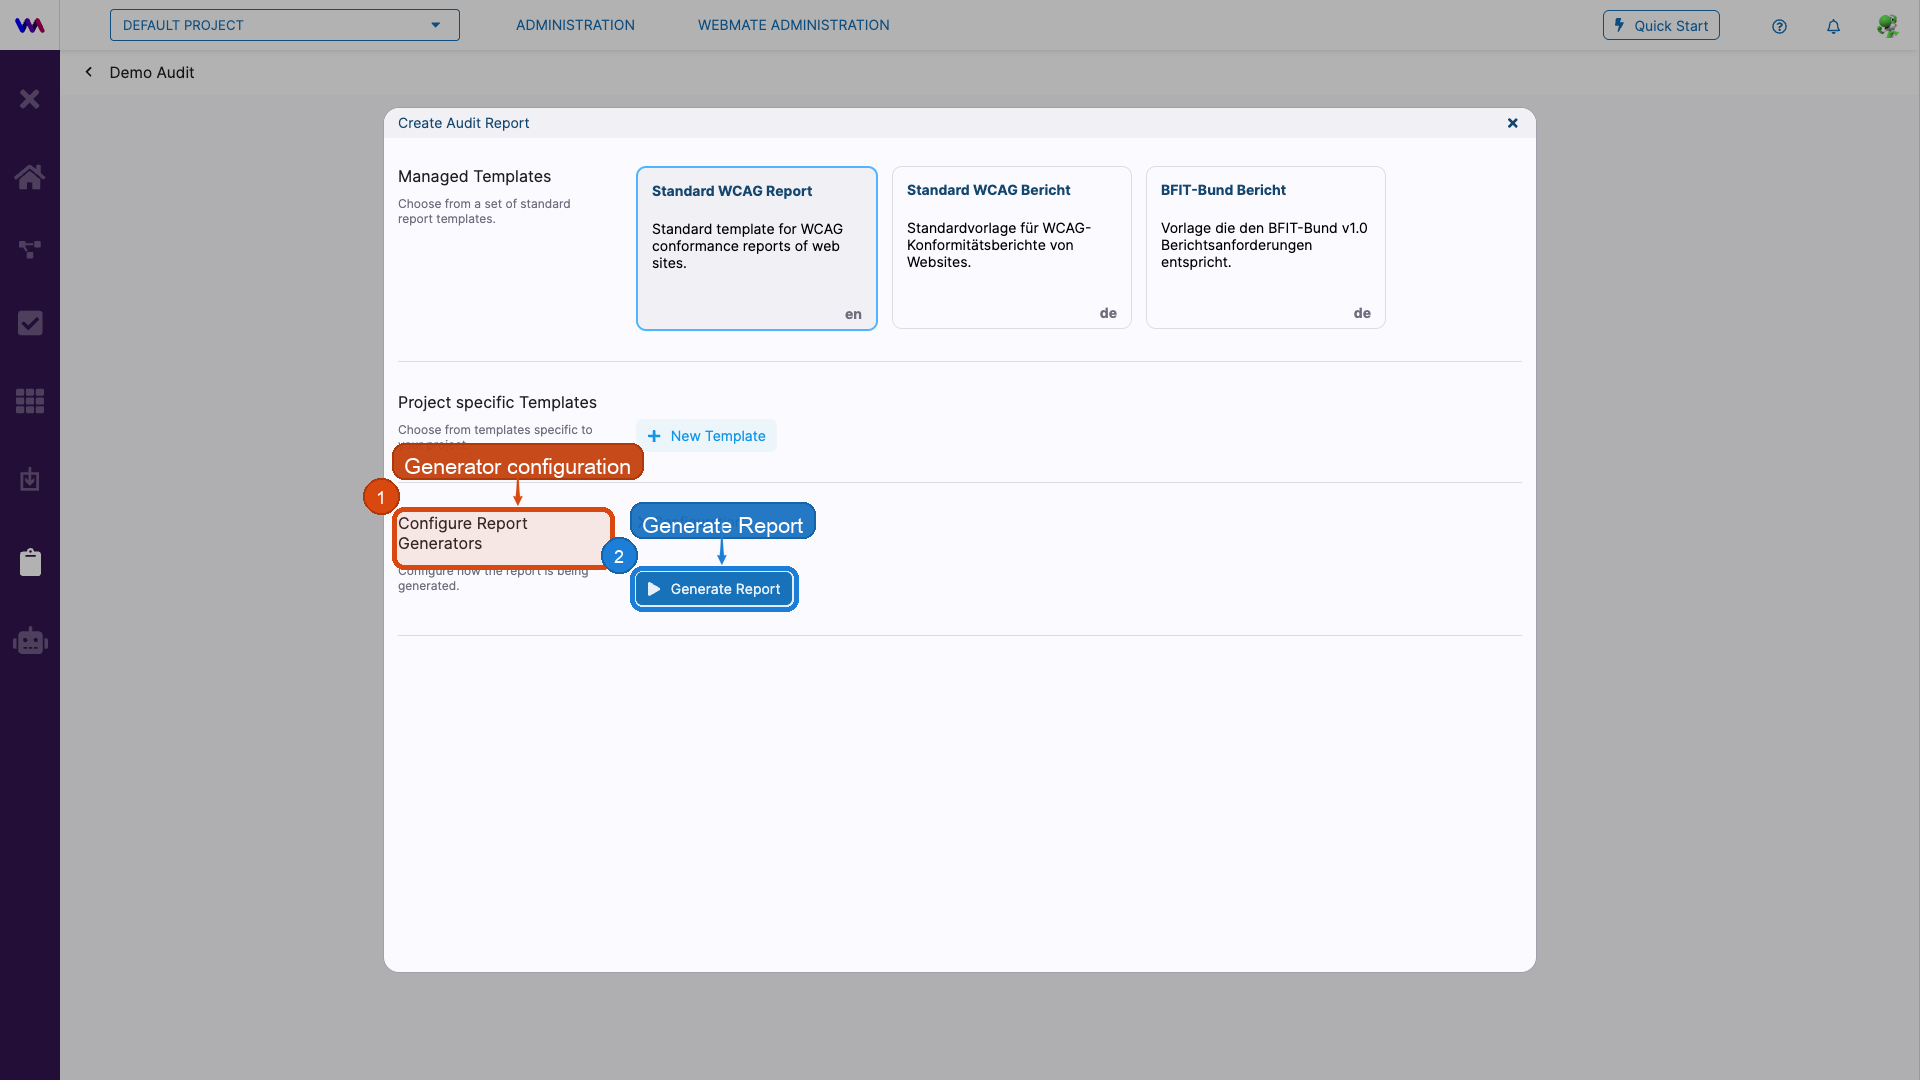
Managed templates can include different generator types. Project-specific templates currently support manually authored static sections for custom content.
Report section generators
A report is composed of one or more section generators. Each section generator produces a distinct part of the output document.
Static Section (StaticSectionGeneratorConfig)
A manually authored section with arbitrary content, such as text, images, tables, or charts. Static sections can contain nested subsections.
Table of Contents (TableOfContentsGeneratorConfig)
Automatically generates a table of contents from the surrounding report structure. No content configuration is required.
Requirement Result Matrix (RequirementResultMatrixSectionGeneratorConfig)
Generates a matrix that maps requirements to test objects and shows their evaluation results. The included activities are controlled by a filter for specification, test object, evaluation status, or tag. The section can also include an optional legend and caption.
Activities Section (ActivitiesSectionGeneratorConfig)
Dynamically generates a section from filtered audit activities. Activities can be grouped by Test Object, Spec, or Severity, and findings can be filtered further. The section can optionally include an overview subsection and a Findings by test object statistics block.
Generate and review the report
After selecting a template and checking the generator configuration and parameters, click Generate Report.
Once the report has been generated, a preview is available. From this view, you can edit the report, download it as a PDF, or share it.
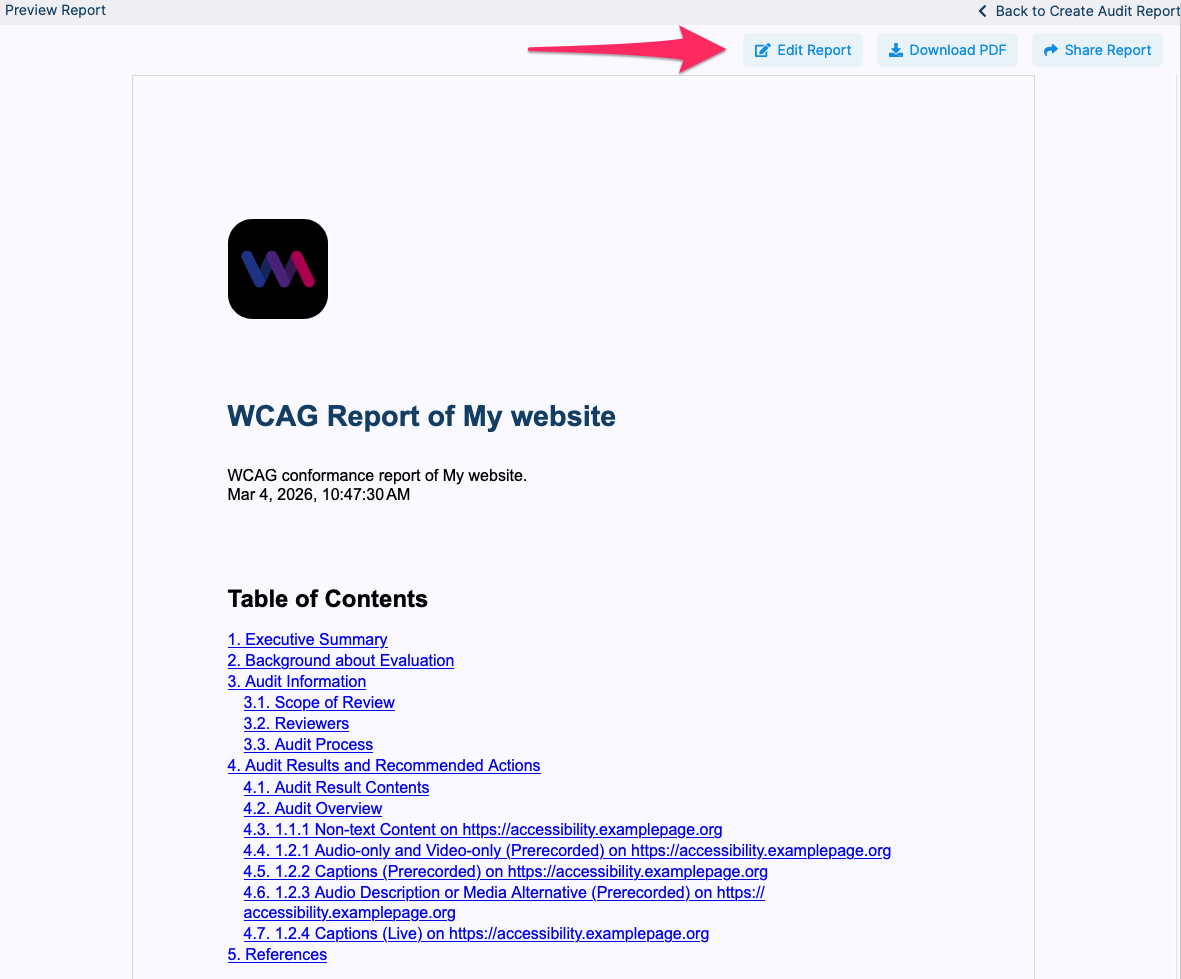
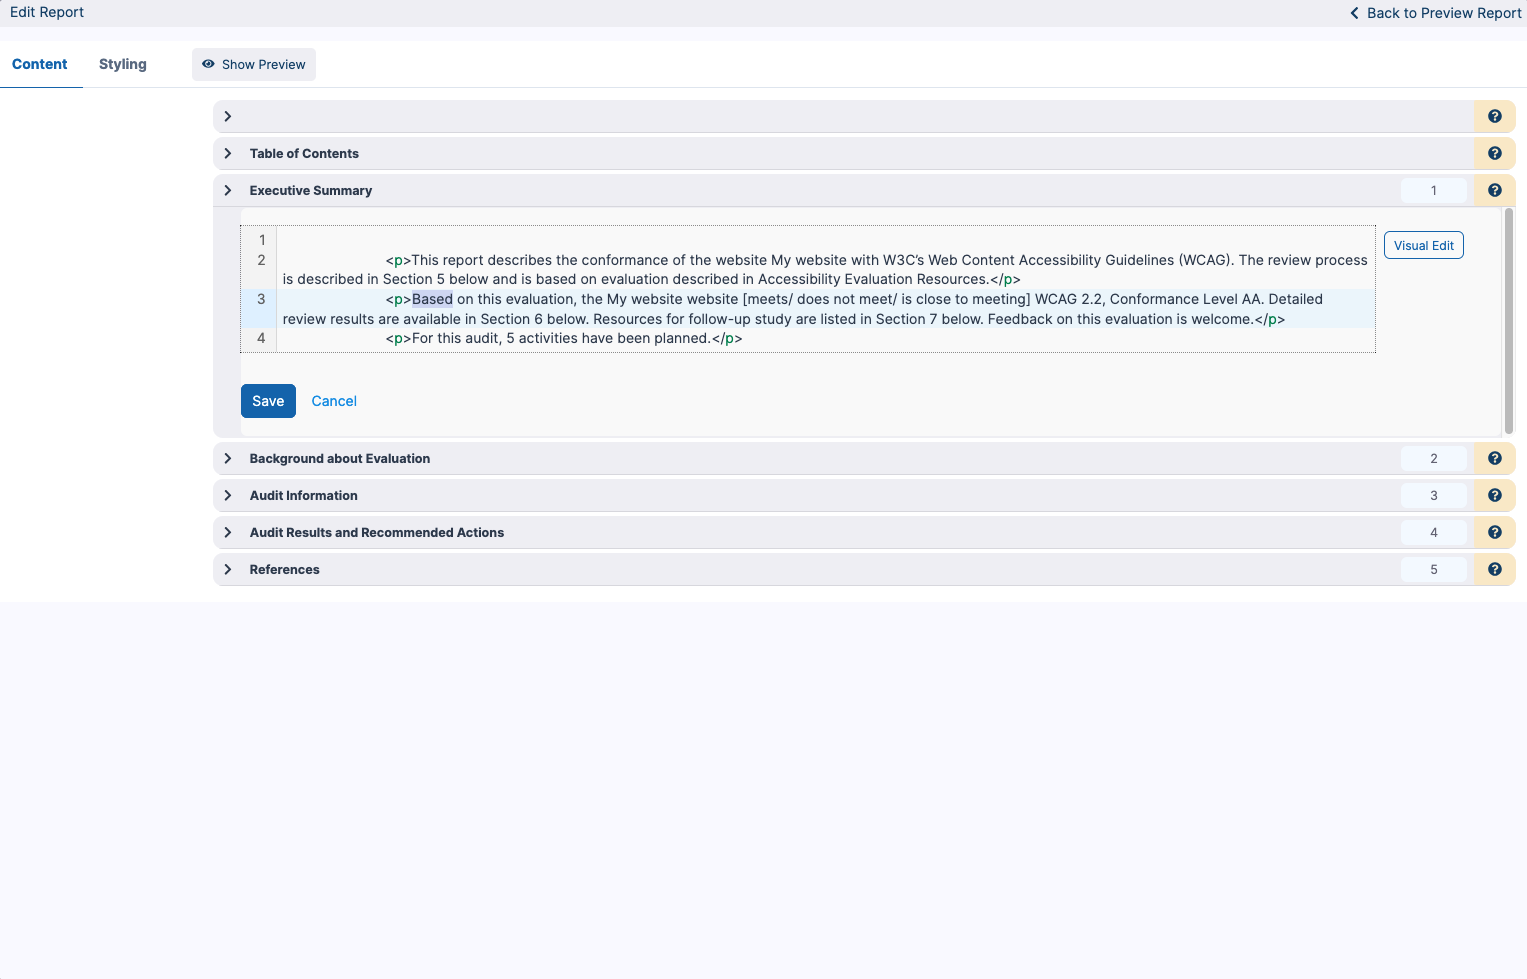
To edit the report, click Edit Report and make your changes within the individual chapters. When you are finished, click Save to apply your changes.
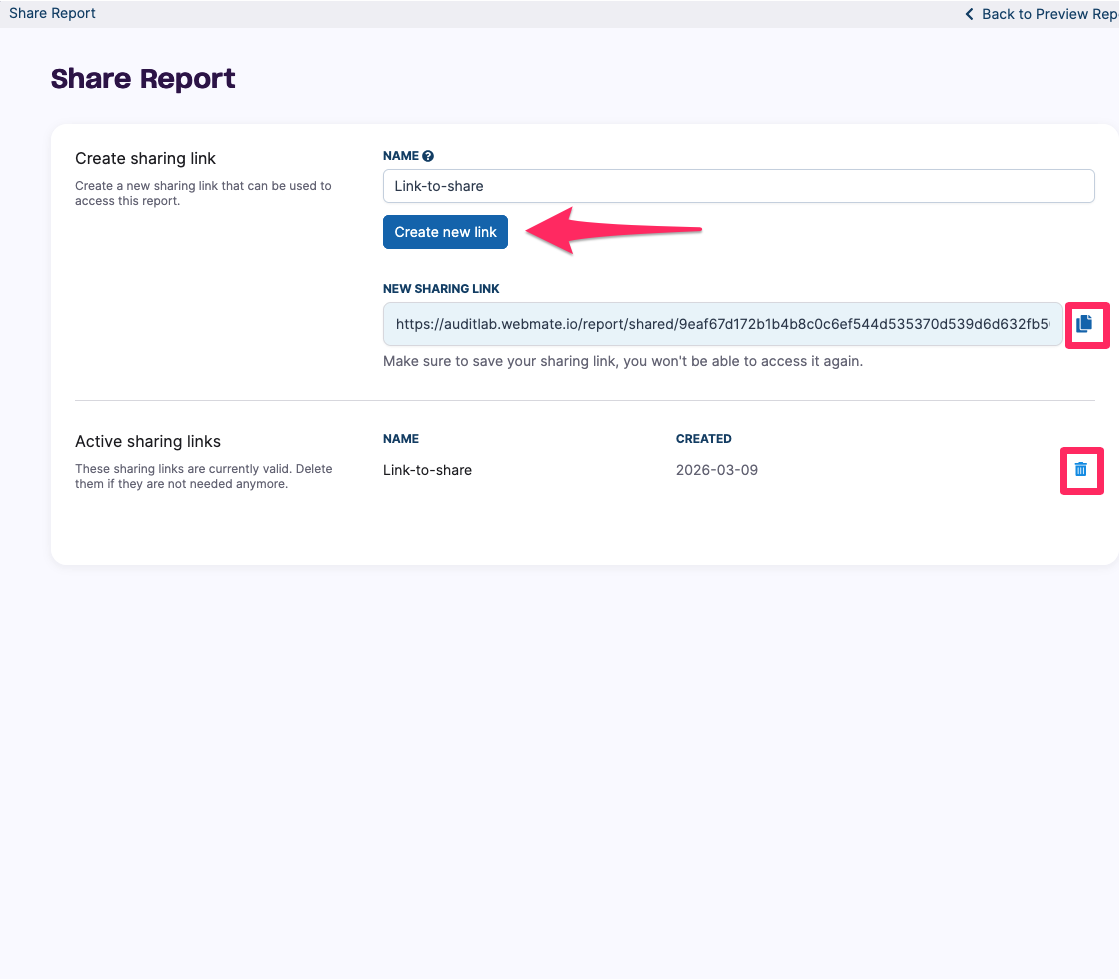
To share the report, click Share Report. In the pop-up window, enter a name in the respective field and click Create new link. A shareable link will be generated, which you can copy using the copy button. You can also delete the link using the delete button.
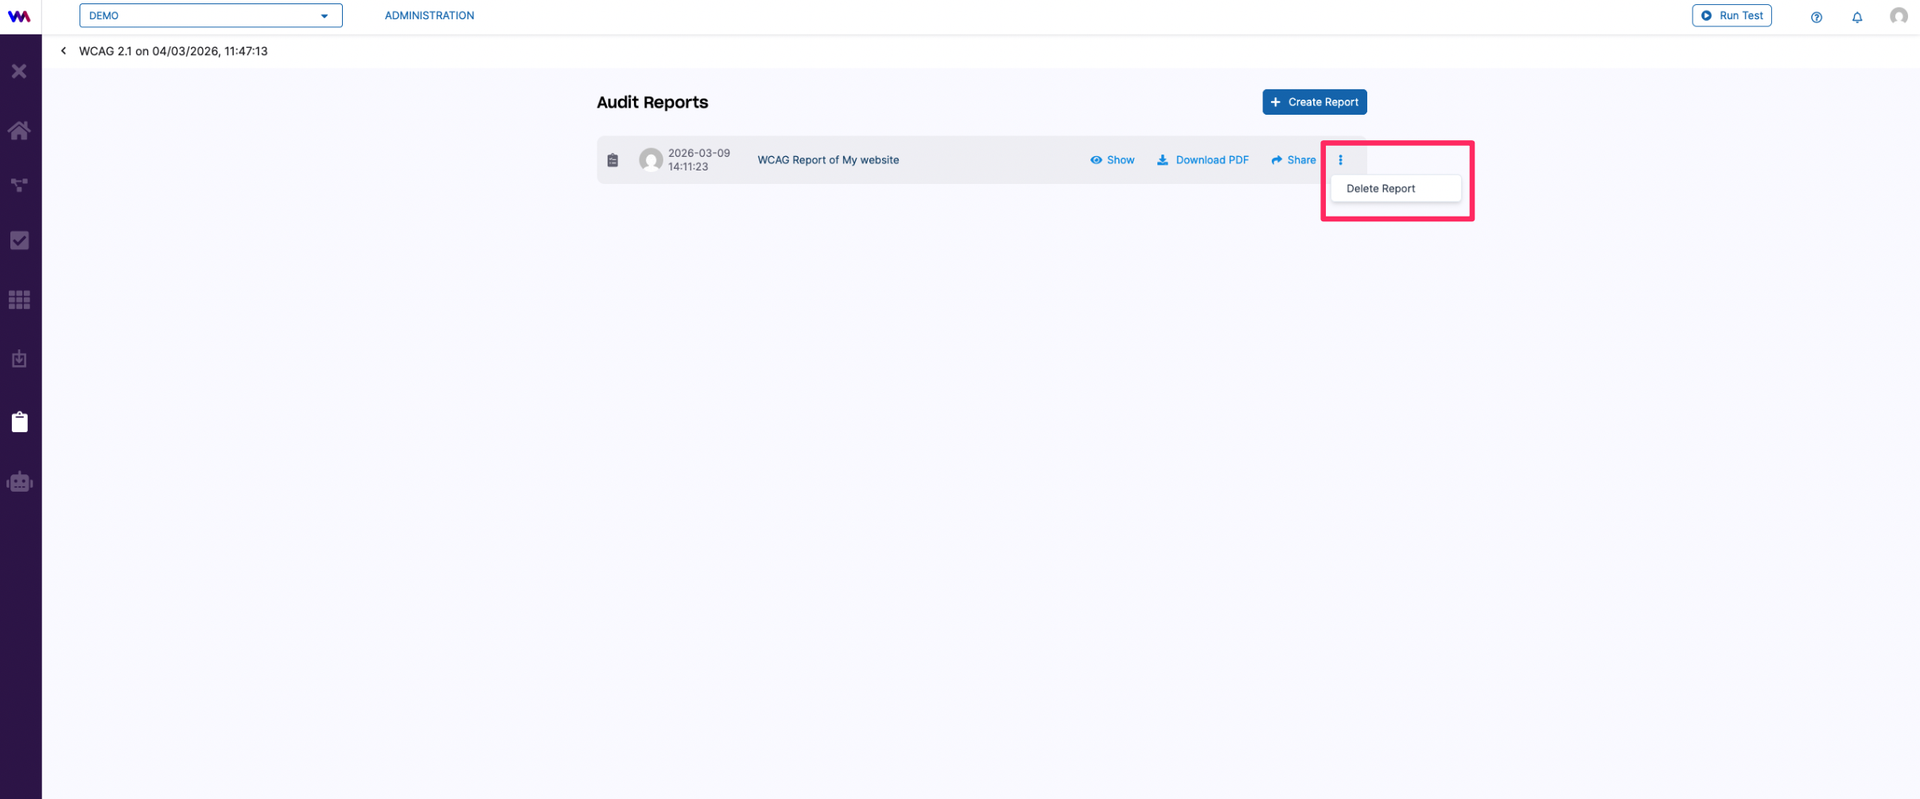
You can delete a report from the Reports tab by clicking the menu button and selecting Delete Report.